To create a thriving Discord server with over 1,000 active members, start by enabling Community Settings to unlock advanced tools like Server Insights and Stage Channels. Structure your server with clear categories, implement Reaction Roles for self-assignment, and set up the Discord Onboarding Feature to guide new users. Use bots like the MEE6 Leveling System to gamify engagement and AutoMod for safety. Finally, grow your base by listing on directories like Disboard and Top.gg.
Did you know that millions of people around the world use Discord to connect with others who share similar interests? Whether you’re building a gaming community, study group, or social hub, creating a thriving server is crucial for fostering engagement and driving active membership.
As you embark on creating your own Discord server, you’ll want to ensure it’s structured in a way that encourages member participation and makes it easy for users to navigate. This involves setting up the right channels, roles, and permissions to create a welcoming space for your community.
By following a step-by-step approach to setting up your server, you can create a vibrant space where members want to spend their time. Let’s dive into the process of creating a Discord server that drives active membership and builds a loyal community.
Key Takeaways
- Learn how to structure your Discord server for maximum engagement
- Discover the importance of clear channels, roles, and permissions
- Understand how to create a welcoming community on Discord
- Find out how to maintain an active server community over time
- Get insights into transforming your Discord server into a vibrant space
Understanding Discord Servers
A Discord server is a digital gathering place where users can communicate and collaborate. Think of it like gathering at your home with friends; you can have multiple conversations happening in different rooms, all under one roof. When you enable Community Settings, you unlock powerful tools to manage your growing user base effectively.
What Makes Discord Servers Unique
Discord servers stand out due to their flexibility and customization options. You can create various channels for different topics, making it easy to organize conversations. This flexibility allows you to build a community that is tailored to your specific interests or goals.
Benefits of Creating Your Own Server
By creating your own Discord server, you gain complete control over your digital space. You can set the rules and determine the culture of your server, ensuring it aligns with your vision. Some key benefits include:
- Building a tailored community that matches your interests or goals.
- Organizing conversations effectively through custom channels and categories.
- Implementing moderation tools to keep your community safe and welcoming.
- Designing an experience that perfectly matches what your potential members are looking for.
Creating a Discord server allows you to foster a thriving community of engaged members. With the ability to customize your server, you can ensure that it grows into a vibrant hub that meets the needs of your users.
Why You Should Create a Discord Server
If you’re looking to build a strong community, a Discord server is an ideal platform. Creating a Discord server allows you to bring people together, organize conversations effectively, and build lasting connections among your members.
Bringing Communities Together
A Discord server provides a unique way to foster deeper connections among community members. Through real-time communication and shared experiences, your server can become a hub for meaningful interactions. You can host various activities like game nights, watch parties, or study sessions that bring server members closer together.
- Real-time communication helps to create a sense of community.
- Shared experiences strengthen bonds among members.
- Activities like game nights or study sessions promote interaction.
Organizing Conversations Effectively
One of the key benefits of a Discord server is the ability to organize conversations using various channels. You can create text and voice channels that cater to different topics or activities, making it easier for members to find and engage with relevant content. This organization helps to reduce clutter and improve the overall user experience.
Building Lasting Connections
Consistent interaction within your Discord server helps build a sense of familiarity and trust among members. As members participate in discussions and activities, they form stronger bonds with one another. Server roles can be used to recognize contributions and create a sense of identity and belonging within your community. Over time, these connections can extend beyond the server, resulting in lasting friendships.
By creating a Discord server, you’re not just building a community – you’re creating a space where people can connect, share, and grow together.
Discord Server Setup: Step-by-Step Guide
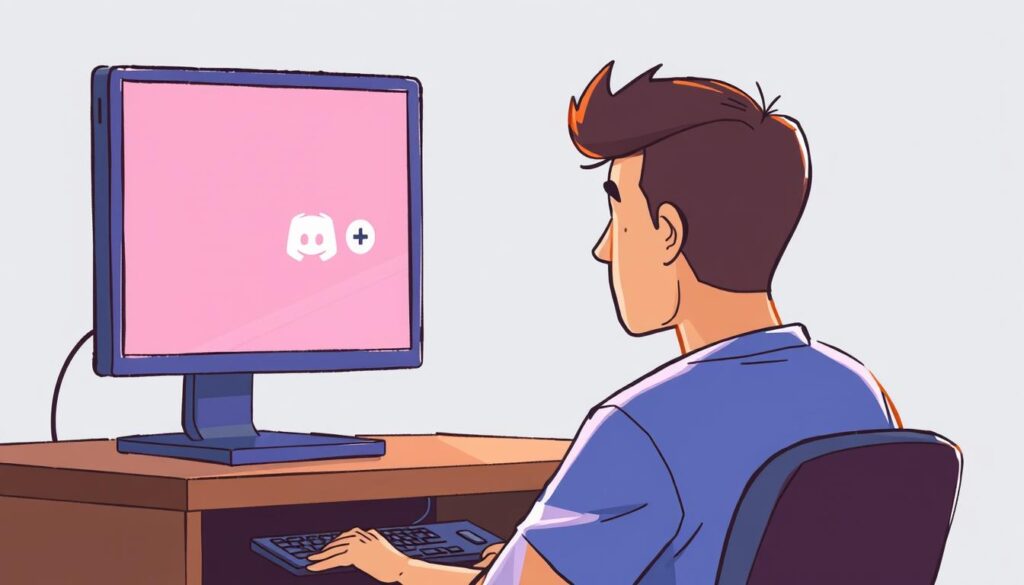
Creating a Discord server is easier than you think, and we’re here to guide you through it. Whether you’re using a desktop or mobile device, the process is straightforward and simple.
Creating a Server on Desktop
To create a Discord server on your desktop, start by opening the Discord app on your computer. Once you’re logged in, look for the “+” icon in the server list on the left side of the screen. Click on this icon to begin the server creation process.
You’ll be given the option to “Create My Own” server or use a template. Choosing “Create My Own” allows you to start from scratch, while templates provide a pre-configured setup for specific types of communities.
After selecting your preferred method, you’ll be prompted to give your server a name and optionally upload a server icon. Once you’ve done this, click on the “Create Server” button to finalize the process.
Setting Up a Server on Mobile
To launch the Discord app on your mobile, locate the Discord icon and give it a click. After launching the Discord app, find the “+” icon present at the bottom of the server and chat list and give it a click.
- Follow an easy mobile-specific guide to create your Discord server using the iOS or Android app.
- Learn how to locate and tap the “+” icon in the mobile interface to begin the server creation process.
- Understand how the mobile server creation flow differs slightly from the desktop version while achieving the same result.
- See how to select between creating your own server from scratch or using one of Discord’s helpful templates on a mobile device.
- Learn how to enter your server name and upload a server icon directly from your phone’s gallery or camera.
By following these steps, you can easily set up your Discord server on either desktop or mobile devices, allowing you to connect with your community wherever you are.
Choosing the Right Server Template
When setting up your Discord server, one of the first decisions you’ll make is choosing the right server template. Discord provides various templates to help you get started, each designed for different types of communities. This choice will significantly influence the initial structure of your server, including the channels that are created automatically.
Available Server Templates
Discord offers several server templates to cater to different needs. For example, you might choose a template designed for a community of friends, a gaming group, or a school club. Each template comes with a set of pre-configured channels that are relevant to the community type. For instance, a gaming community template might include channels for different games, announcements, and coordination. You’ll then be asked what the server’s about, and depending on your answer, you’ll be given a different set of starter channels to talk in.
When to Use Custom Setup
While server templates can be a great starting point, there are situations where a custom setup is more appropriate. If your community has a unique concept or specialized purposes, starting from scratch might be the better option. A custom setup gives you complete control over your channel structure without any preset assumptions about what your community needs. This approach allows you to create a more distinctive server experience that stands out from template-based communities. However, it requires more time and planning to ensure you don’t overlook essential channels.
To make the most of a custom setup, study existing template structures before creating your own. This can help you combine the best aspects of templates with your own ideas, resulting in a coherent and intuitive design for your Discord server.
Structuring Your Discord Channels
Creating an intuitive channel structure is key to keeping your Discord community engaged. A well-organized server makes it easier for users to find the information they need and participate in discussions.
Text Channels vs. Voice Channels
When setting up your Discord server, you’ll need to decide between text channels and voice channels. Text channels are ideal for sharing information, asking questions, and collaborating on projects. Voice channels, on the other hand, are perfect for real-time discussions, voice chats, and community events. Additionally, you can utilize **Stage Channels** for organized presentations where only selected speakers can broadcast to the audience.
Creating Category Sections
Categorizing your channels helps maintain a clean and organized server. For example, you might create categories for “Information,” “General,” “Projects,” and “Mods.” Within these categories, you can create specific channels like #rules, #announcements, #lobby, and #off-topic.
| Category | Example Channels |
|---|---|
| Information | #rules, #announcements |
| General | #lobby, #off-topic |
| Projects | #survival_redstone, #creative_redstone |
Channel Naming Best Practices
Naming your channels effectively is crucial for clarity. Use descriptive and concise names that indicate the channel’s purpose. For instance, “📢-announcements” or “💬-general-chat” clearly convey the channel’s use. Consistency in naming conventions creates a professional appearance and reduces confusion among users.
- Use prefixes or symbols to indicate channel types or purposes.
- Balance creativity with clarity when naming channels.
- Avoid common pitfalls like using overly complex or cryptic names.
By following these guidelines, you can create a server that’s easy to navigate and enjoyable for your community.
Setting Up Server Roles and Permissions
To keep your Discord community organized and secure, setting up appropriate roles and permissions is essential. Roles act as a crucial mechanism for managing member capabilities and access within your server.
Creating a Role Hierarchy
Establishing a clear role hierarchy is vital for the effective management of your Discord server. This involves creating a structured system where roles are layered, allowing for a clear distinction between members, moderators, and administrators.
You can start by defining the highest level of authority, typically the administrator role, and then create subsequent roles that branch out with decreasing levels of access and responsibility. To streamline role assignment, consider setting up **Reaction Roles**. This allows members to self-assign roles by simply clicking an emoji reaction on a message.
Assigning Permissions Effectively
Permissions determine what actions members can perform within your server. When assigning permissions, it’s crucial to follow the principle of least privilege, granting members only the permissions necessary for their role.
- Review the available permissions and understand their implications.
- Assign permissions based on the roles you’ve created, ensuring that each role has the appropriate level of access.
- Regularly audit your roles and permissions to ensure they remain aligned with your server’s needs.
Special Roles for Bots and Moderators
Bots and moderators play critical roles in maintaining the health and functionality of your Discord server. Creating specialized roles for them is essential.
For bots, you should create roles with carefully limited permissions to ensure they can perform their intended functions without posing a risk to your server’s security. Discord’s built-in integration roles for bots can simplify this process.
| Role | Description | Permissions |
|---|---|---|
| Moderator | Oversees community behavior and enforces rules. | Manage Messages, Kick/Ban Members |
| Bot | Automates tasks and enhances server functionality. | Send Messages, Embed Links |
By carefully configuring roles and permissions, you can create a well-organized and secure Discord server that supports a positive and engaging community.
Customizing Your Server’s Appearance
Customizing your Discord server’s appearance is a great way to make it stand out and reflect your community’s personality. A well-designed server not only looks great but also enhances the overall user experience for your members.
Server Icon and Banner
Your server’s icon and banner are the first things that members see when they join. Making a great first impression is crucial. You can upload a custom icon and banner that represent your community’s theme or brand. Ensure that your images are visually appealing and comply with Discord’s guidelines.
Custom Emojis and Stickers
Custom emojis and stickers add a fun and personal touch to your server. They allow members to express themselves in unique ways. With Discord’s emoji and sticker customization, you can create a more engaging and interactive environment. You can even use them to convey inside jokes or community-specific expressions.
Server Boost Perks
Discord’s Server Boost system is a fantastic way for members to support their favorite servers. As your server gets more boosts, you unlock various perks, such as animated server icons, custom banners, and higher quality voice channels. Here’s a breakdown of the boost levels and their perks:
| Boost Level | Perks |
|---|---|
| Level 1 | Animated server icon, custom banner |
| Level 2 | Higher quality voice channels, increased emoji slots |
| Level 3 | Even higher quality voice channels, more custom sticker slots |
Encouraging your members to boost your server can lead to a more engaging and rewarding experience for everyone. You can thank and recognize your boosters with special roles or exclusive perks, fostering a sense of community and appreciation.
Inviting Members to Your Discord Server
Now that your Discord server is set up, it’s time to invite friends and start building your community. Inviting members is a crucial step in making your server lively and interactive.
Creating and Sharing Invite Links
To invite friends to your server, look for the “Invite Your Friends” button in the middle of the chat window. Clicking this will give you the option to invite friends directly or share an invite link. You can also use the invite button in the server’s drop-down menu on the top-left to create an invite link. This link can be shared with your friends or posted on social media to attract new members.
Setting Up Welcome Channels
A well-structured welcome channel is essential for making new members feel welcome and oriented. Use Discord’s welcome screen feature to highlight your most important channels. Instead of just a static message, consider enabling the **Discord Onboarding Feature**, which allows new members to answer questions and choose their own roles and channels immediately upon joining. Craft a welcoming message that clearly communicates your server’s purpose and culture.
By following these steps, you can create a friendly and accessible atmosphere in your server, making it an enjoyable space for your community to grow.
Essential Bots for Active Communities
Bots are essential for managing and enhancing your Discord community experience. They can help with moderation, provide useful information, and even entertain your members. By integrating the right bots into your server, you can create a more engaging and active community.
Moderation Bots
Moderation bots are crucial for maintaining order in your Discord server. They help manage member behavior, filter out inappropriate content, and enforce server rules. While Discord offers a built-in **AutoMod** tool to block harmful words and phrases, third-party bots offer granular control and detailed logging. By using moderation bots, you can ensure your community remains a welcoming and safe space for all members.
Utility and Information Bots
Utility and information bots provide valuable services to your Discord community. They can offer information on various topics, help with server management tasks, and even provide entertainment. For example, some bots can display server statistics, while others can offer news updates or help with event planning. These bots enhance the overall user experience and make your server more informative and engaging.
Entertainment and Engagement Bots
Entertainment and engagement bots are designed to keep your community active and engaged. A popular choice is the **MEE6 Leveling System**, which gamifies participation by awarding XP to active members. They can also host games, play music, or even facilitate trivia sessions. By incorporating these bots, you can create a more dynamic and enjoyable environment for your members.
Strategies for Growing Your Discord Community
Creating a vibrant Discord community is a multifaceted process that involves various growth strategies. To expand your Discord server, you need to focus on both internal engagement and external promotion.
Effective External Promotion
Promoting your Discord community outside of the platform is crucial. You can list your server on popular directories like **Disboard** and **Top.gg** to attract new users searching for communities like yours. Avoid spamming your invite link on random servers, as this can lead to negative consequences. Instead, share your link on relevant social media platforms, forums, and websites where your target audience is active.
Learn how to build mutually beneficial relationships with other communities that share overlapping interests with yours. This can lead to valuable partnerships that benefit both parties.
Cross-Platform Integration
Integrating your Discord server with other platforms can help you reach a broader audience. Share your Discord link on Twitter, Facebook, and other social media sites to attract new members.
Collaboration with Related Communities
Collaborating with related communities can introduce your server to new potential members. Joint events, shared channels, or collaborative projects are excellent ways to foster growth. Learn how to approach server owners for potential collaborations in a respectful and professional manner.
By implementing these strategies, you can create a thriving Discord community that attracts and retains members. Remember, growing a community takes time, so be patient and focus on building meaningful relationships.
Maintaining an Active Server Community
A thriving Discord server relies heavily on maintaining an active and engaged community. To achieve this, you need to strike a balance between encouraging participation and respecting members’ changing life circumstances.
Hosting Regular Events
Hosting regular events is a great way to keep your community engaged. Organize events that relate to your server’s topic, and make sure they’re fun and inclusive. This will encourage members to participate and interact with each other.
Encouraging Member Participation
To encourage members to participate, create an environment where they feel comfortable sharing their thoughts and ideas. Use check-in channels or welcome back messages to reconnect with inactive members. This will help you identify potential issues and re-engage dormant members before they disconnect completely.
Handling Inactive Members
Handling inactive members requires a thoughtful approach. Analyze patterns of inactivity to identify potential issues, and consider using Discord’s member pruning feature if necessary. However, be cautious not to overdo it, as this can harm community trust. Use **Server Insights** and analytics to track activity patterns and make informed decisions.
By following these strategies, you can maintain an active server community over time. Remember to be patient and flexible, as building a strong community takes time and effort.
Conclusion
As you finalize your Discord server setup, remember that the key to success lies in understanding your community’s needs and adapting accordingly. Building an engaged community takes time, consistency, and genuine care for your members’ experience. Your server structure should evolve based on your community’s needs rather than following rigid templates.
The most successful Discord servers balance clear organization with flexibility to accommodate growth and change. By implementing the strategies outlined in this guide, you’ll be well on your way to creating a Discord space that fosters meaningful connections and conversations. Take the first step toward making your server a thriving hub today.
FAQ
How do I create a new role in my community?
To create a new role, go to your Server Settings, then click on Roles, and hit the + button to add a new role. You can customize the role name, permissions, and color to fit your community’s needs.
What’s the difference between text and voice channels?
Text channels are for messaging, while voice channels are for live voice conversations. You can use text channels for discussions, announcements, and sharing resources, and voice channels for live events, meetings, or casual hangouts.
How do I invite friends to join my community?
To invite friends, go to your Server Settings, click on Invite People, and generate an invite link. You can share this link with others via social media, email, or messaging apps.
Can I customize my community’s appearance?
Yes, you can customize your community’s appearance by uploading a Server Icon and Banner, creating Custom Emojis and Stickers, and using Server Boost Perks to unlock exclusive features.
How do I set up a welcome channel for new members?
To set up a welcome channel, create a new text channel and name it something like “welcome” or “introductions.” You can then set this channel as the default channel for new members in your Server Settings.
What are some essential bots for my community?
Some essential bots include Moderation Bots to help manage your community, Utility and Information Bots to provide useful resources, and Entertainment and Engagement Bots to keep your members engaged and active.
How can I encourage member participation?
To encourage member participation, you can host regular events, create engaging content, and recognize and reward active members. You can also use bots to help facilitate discussions and activities.
What are some strategies for growing my community?
To grow your community, you can promote it on external platforms, collaborate with related communities, and integrate your community with other services. You can also use social media to reach a wider audience.
