To make an Instagram Story, open the app and swipe right to access the camera. You can capture content using tools like Hands-free mode, Dual camera, or Boomerang. Customize your post with the Link sticker and text, manage visibility via your Close Friends list, and publish instantly by tapping the Your Story button.
Quick, visual, and built for mobile — a story lets you share photos and short video moments that vanish after 24 hours. Launched in 2016, instagram stories sit at the top of the app as profile circles so they catch attention fast.
The process is simple and friendly for new users. First, open the story camera. Next, capture or add a photo or video. Then personalize with stickers, text, music, or filters. Finally, pick privacy (Close Friends, public, private) and post to Your Story.
This guide shows why ephemeral posts boost engagement and lower pressure for authentic sharing. You’ll learn visibility rules by account type, how replies and views work, and why short clips fit how people swipe through profile circles. Follow the clear steps ahead and publish your first story in minutes.
Key Takeaways
- Stories are 24-hour posts that appear as circles at the top of the app.
- Simple steps: open camera, add photo/video, personalize, set privacy, post.
- Ephemeral content drives authentic engagement and quick shares.
- Public vs. private accounts change who can view your story.
- Use stickers, polls, and music to make content interactive.
What an Instagram Story Is and Why It’s So Popular Right Now

Short-lived posts sit at the top of the feed and invite immediate attention. These bite-sized sequences of photos and video show as profile circles for 24 hours, so people check them often during the day.
The 24-hour time limit matters because it lowers pressure to be perfect. Users share quick, honest moments more freely. That authenticity drives more clicks, replies, and direct messages than polished feed posts.
Navigation is simple: tap right or left to move through a story, or swipe to jump to someone else. Each video clip runs up to 15 seconds and longer uploads split automatically for smooth playback.
- Top placement: increases visibility and repeat views.
- Short clips: match fast attention spans and encourage frequent posting.
- Algorithmic order: the app favors accounts you interact with, so consistency helps your reach.
| Feature | Benefit | Practical tip |
|---|---|---|
| 24-hour lifespan | Encourages candid content | Post more often without cluttering your profile |
| Top-of-feed circles | Higher initial visibility | Share time-sensitive updates early in the day |
| 15-second segments | Easy consumption on mobile | Keep clips tight and focused |
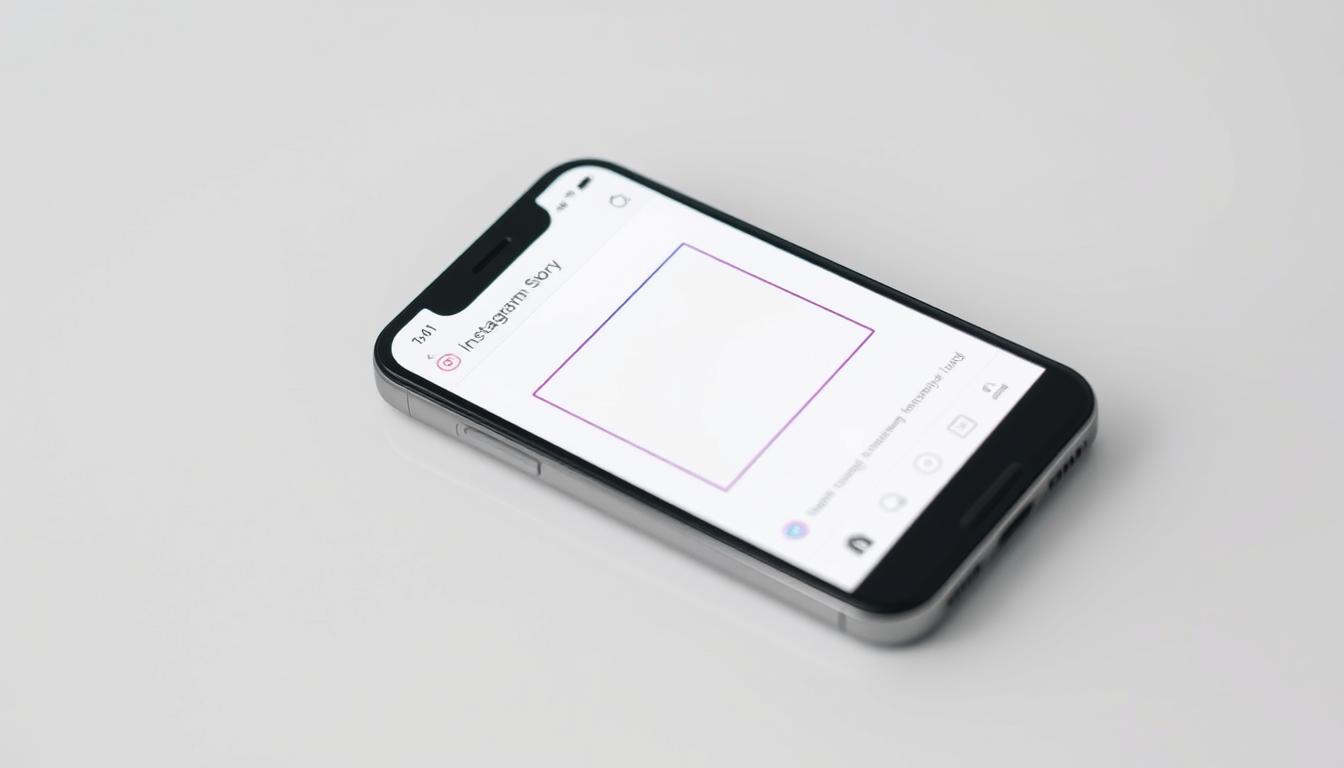
The Instagram Stories Interface at a Glance
 that can be posted. In the background, a soft, blurred gradient of the Instagram brand colors (pink, purple, orange) creates a visually appealing and on-brand atmosphere. The lighting is natural and diffused, giving the scene a warm, inviting feel. The camera angle is slightly elevated, providing an overview of the interface and creating a sense of user-friendliness and accessibility.")
The home screen puts active content front and center, letting viewers swipe and tap through moments fast.
Where they live: Circular profile icons sit at the top of the home screen. Tap any circle to open that account’s instagram stories and start viewing.
How viewers move: Tap the right side of the screen to advance, tap left to replay the previous segment, and swipe to jump to the next person’s stories. Use the progress bar at the top to time your message.
- Your own entry points are at the top left (tap your profile) or the + icon at the top right to open the camera quickly.
- Core on-screen controls include the large capture button, sticker and text icons, filters, and a download option.
- Reactions and replies are lightweight: users can send emoji reactions or DM replies if you permit them in settings.
| Element | Location | Tip |
|---|---|---|
| Profile icon | Top row of home screen | Post during peak hours for higher initial views |
| + icon | Top right | Quick access for on-the-fly capture |
| Capture button | Bottom center | Keep clips short and clear for easy taps |
Prep Before You Post: Content, Lighting, and Orientation

A little prep sets your content up for higher engagement and cleaner visuals. Start by defining a single goal: inform, entertain, or drive action. Outline one clear message per sequence so your audience spends their time wisely.
Shoot vertical (1080×1920, aspect ratio 9:16) so your photos and videos fill the frame. Keep key elements centered so text and stickers don’t cover faces or important visuals.
Use natural window light or a soft source facing you. Avoid backlight that creates silhouettes. Stabilize your camera with a phone stand or steady surface to cut motion blur and shaky footage.
- Script brief beats—each video plays up to 15 seconds per segment.
- Capture a safety take for options if the first photo or clip feels off.
- Test audio levels and reduce background noise for clear voice playback.
- Pre-build reusable templates in Canva or Planoly for consistent brand frames and faster posting.
Plan a simple CTA up front (for example, “Vote in the poll” or “DM me”). That guides viewers through a clear next step and helps your content meet its goal.
Open the Story Camera and Capture Your Photo or Video

Ready to record? Launch the in-app camera from the home feed and capture a moment fast. You can enter camera mode in three simple ways: swipe right on the home feed, tap your profile picture at the top left, or hit the + icon at the top right.
Basic capture controls: tap the large capture button for a photo or press and hold for a video clip. Use Hands-free mode to record without holding the button, or tap the thumbnail at the bottom to import from your gallery.
Switch between front and rear lenses, or try the Dual camera feature to capture both views simultaneously. Keep your phone steady or brace it—this reduces blur in low light and lifts production value.
Creative modes worth trying:
- Boomerang for a short looping movement that grabs attention.
- Layout mode to combine multiple images into a single grid frame.
- Multi-Capture to shoot several short moments in a row and review them on the screen.
Apply filters before capture for a consistent look, or add them after if you want more control. Quick retakes and short clips usually perform best, so keep energy high and edits minimal.
Add From Gallery or Shoot In-App: Photos, Videos, and Multi-Capture

You can mix saved photos with live captures to build a sequence that feels planned and spontaneous. In story mode, swipe up or tap the bottom-left thumbnail on the screen to open recent photos and videos from your gallery.
Pick multiple assets to arrange a short narrative. Reorder clips, add fresh shots, and use a brief title photo at the start for context.
Record in-app with Multi-Capture when you want consecutive clips without leaving the camera. This is ideal for step-by-step demos or short walkthroughs.
- Longer clips split automatically into 15-second segments so playback stays smooth.
- Mix gallery images with new captures for both polish and immediacy.
- Trim or remove redundant segments before posting to keep pace tight.
- Save chosen clips to your camera roll if you plan to reuse them elsewhere.
Aim for a clean visual arc: an intro photo, core video moments, and a final frame with a clear call-to-action. That simple structure helps viewers follow your instagram story without effort.
Customize Creatively: Stickers, Text, Music, and Filters

Personal touches—color, music, and stickers—turn casual clips into a brand moment.
Interactive elements that increase engagement
Open the stickers tray and add polls, questions, countdowns, or GIFs to prompt quick replies. These interactive features boost engagement and make your content feel conversational.
Use the Link sticker if your account is eligible, and pair it with a clear CTA so viewers know where to tap.
Design tools and discoverability
Tag a location or add a hashtag sticker to improve discoverability for your stories. These small tags can surface your post in public hubs where new people find your work.
Match text and colors with the color picker and pen tool for clean, on-brand visuals. Keep words short and high-contrast so viewers read them in one glance.
- Apply filters for a consistent mood across multiple clips.
- Use GIFs sparingly—reserve animation for emphasis, not clutter.
- Place stickers where they won’t cover faces or key photo video elements.
- End with a sticker-based CTA—poll, slider, or question—to invite action.
Tip: Use simple, on-brand typography and the highlighter to direct attention. Small, thoughtful edits are an easy way to increase reach and make your story feel professional.
Set Privacy and Sharing Options

Control is key: set who can view and share each post from the story settings screen. Open your profile privacy controls in the app and review visibility before publishing.
A Close Friends list creates a private ring around posts for a chosen circle. Use it for team updates, personal behind-the-scenes, or sensitive announcements.
Close Friends vs public vs private accounts
If your account is private, only approved followers can see your stories. Public accounts are viewable by anyone who taps your story.
Close Friends shows a green ring and limits viewership to the list you build.
Allow replies, reactions, and message sharing
In story options you can choose who may reply: everyone, followers you follow back, or no one. This helps you moderate messages fast.
Decide whether people can share your story in DMs; enabling this can widen reach for useful content.
- Hide Story From: exclude specific profiles without locking your account.
- Link sticker: check privacy so traffic isn’t unintentionally limited.
- Business accounts: keep replies on for feedback and quick customer insights.
Tip: review these features regularly. As your audience grows, adjust settings so privacy matches the sensitivity of each post and your engagement goals.
Post to Your Story and Track Views
When your clip looks ready, choose whether to publish broadly or send it privately. Tap the Your Story button to publish for 24 hours, or use Send to for direct, one-to-one or group sharing.
After your post goes live, swipe up on the screen to see who viewed each frame. That view list helps you spot which followers and users return again and again.
Key engagement signals: watch taps forward, taps back, exits, and replies. Taps back often mean viewers rewatched a moment. Exits can flag confusing visuals or too much text.
- Stories remain visible for 24 hours; pin top-performing ones to Highlights for longer exposure.
- Use direct sends for VIPs, partners, or collaborators when a targeted message fits best.
- Save a copy of a strong sequence if you plan to repurpose it on other channels.
| Action | Where to check | What it reveals |
|---|---|---|
| Swipe up on a frame | Story screen | Viewer list and basic interactions |
| Monitor taps forward/back | Story analytics view | Navigation behavior and interest level |
| Track exits and replies | Story analytics view | Content clarity and direct engagement |
Pair posting times with your audience’s active windows to boost early momentum. If a video frame underperforms, try a tighter crop, shorter delivery, or clearer on-screen text next time.
Review performance weekly and adjust cadence, content mix, and calls-to-action based on the trends you see. Small tests build better long-term engagement.
Instagram Stories vs. Story Highlights
Save standout moments to a pinned collection so they live on your profile beyond the usual 24-hour window. Highlights are curated collections that sit under your bio as circular icons and give important content ongoing visibility.
Stories are temporary and vanish after a day. Highlights let you keep key sequences indefinitely and surface them at the top of your account for new visitors.
Enable Story Archive to save every post privately. Then add selected items to a highlight for long-term access. This is ideal for product guides, FAQs, or event recaps that serve users over time.
- Organize by theme: labels like “Products,” “FAQs,” or “Events” help visitors self-navigate your profile.
- Keep covers simple: use a clear icon and short title for quick recognition.
- Edit as needed: add or remove clips so your highlights stay current and useful.
Treat highlights as a lightweight navigation layer. Feature evergreen content and concise sequences so first-time visitors can learn what matters most at the top of your profile.
Pro Tips to Boost Engagement on Stories
Well-timed clips and crisp copy turn casual viewers into active users. Keep each frame focused on one idea so people grasp it in a glance. Short text and high-contrast typography help fast reading.
Spacing matters: post several short segments over the day to reappear at the top of the feed and reach different audience windows. Space posts so you share updates without overwhelming users.
Use interactive stickers such as polls, questions, and quizzes to prompt quick responses. If your account is eligible, add a link sticker and pair it with a clear CTA like “Vote,” “DM,” or “Tap the link.”
- Keep text concise and readable; add a direct CTA per frame.
- Apply timely filters and seasonal visuals for better resonance.
- Leverage tools like Canva for templates and Later or Buffer for scheduling.
- For business accounts, collect customer insight with question stickers and turn FAQs into highlights.
- Creators: build recurring formats (for example, a weekly tip) to form audience habits.
Test short videos with auto-captions for sound-off viewers and showcase one product benefit per frame. Review analytics weekly—taps forward/back, exits, and replies—to refine your way of telling concise, engaging content.
Common Mistakes to Avoid on Your First Story
A cluttered frame often loses attention before your message lands. Keep each frame simple so viewers grasp your point in one glance.
Overcrowding with stickers or hard-to-read text
Limit overlays. Too many stickers, GIFs, or tiny type creates visual noise and prompts taps forward or exits.
Keep text brief and large. Use high-contrast colors and place copy away from edges where UI may hide it.
Low‑quality photos/videos and ignoring aspect ratio
Shoot vertical at 1080×1920 so your photo video fills the screen. Long clips split into 15-second segments; plan edits around those breaks.
Avoid shaky, low-resolution media. Blurry photos or shaky videos look unprofessional and reduce trust.
- Resist multiple CTAs on one frame—present one clear action at a time.
- Don’t rely only on audio; add captions for sound-off viewers.
- Use features like polls only when they add real value.
| Mistake | Effect | Fix |
|---|---|---|
| Too many stickers | Exits and fast taps | Limit overlays; support the message |
| Tiny text | Unreadable on small screens | Large, high-contrast copy away from edges |
| Poor media quality | Lowered credibility | Shoot vertical, stable, high-res |
Use analytics—spikes in exits or rapid taps forward reveal frames that need simplification. This is the best way to improve future stories.
Instagram Story tutorial, How to make an Instagram Story, Create Instagram Story
Use this quick reference to wrap capture, editing, posting, and discovery into one tidy routine.
Open the creator by swiping right, tapping your profile circle at the top-left, or using the + icon at the top-right of the app.
Add media from your camera roll or capture fresh photos and videos. Then refine with text, stickers, and filters.
- Place CTAs where they’re obvious and use the link sticker if your account is eligible.
- Tap the Your Story button to post, or use Send for direct delivery; watch button labels to avoid mis-taps.
- Track viewers and interactions by swiping up, then adapt based on what your audience watches most.
- Save strong sequences to Highlights on your profile and organize by topic for new users.
| Step | Action | Why it matters |
|---|---|---|
| Open | Swipe right / profile icon / + button | Quick access keeps posting regular and timely |
| Create | Add photos/videos, text, stickers, filters | Polish grabs attention and supports brand recognition |
| Publish & measure | Post, swipe up for viewers, save to highlights | Measure what works and reuse top clips for ongoing reach |
Final checklist: media, message, CTA, post, measure. Repeat regularly and streamline with basic tools so business and creators can stay consistent.
Conclusion
End with a simple action: one photo or clip, one line of text, one CTA button. Follow the five-step workflow—open the camera, add a photo or video, customize, set privacy, and post—and you’ll be live in minutes.
Remember: stories sit at the top of the app for 24 hours and videos break into 15-second segments. Viewers navigate with taps and swipes, so keep each frame focused and easy to scan.
Use interactive stickers or a link button if available, save strong sequences to story highlights, and swipe up on the screen to review taps, exits, and replies. Now: publish one short post, check results, and iterate today.
FAQ
What are the simplest steps for posting your first story?
Open the camera by swiping right or tapping the + icon, capture a photo or video (or choose from your gallery), add text or stickers, set privacy (public or Close Friends), then post to “Your Story.” Keep content short and vertical for best results.
Where do ephemeral posts appear and how long do they last?
These posts appear at the top of the app in circular profile icons and remain viewable for 24 hours unless you save them to Highlights on your profile.
How can you capture without holding the record button?
Use Hands-Free mode in the camera options. You can also try Boomerang for short looped clips or Layout for multi-photo compositions.
Can you add multiple photos or videos at once?
Yes. Choose the multi-capture or gallery option to select and post several items in sequence. This helps create a narrative without multiple uploads.
What creative tools should you use to increase engagement?
Use interactive stickers like polls, question boxes, and GIFs. Add music, location tags, hashtags for discovery, and on-brand fonts. Keep text legible and avoid overcrowding the frame.
How do privacy settings affect who sees your posts?
Public accounts share to all followers; Close Friends restrict visibility to a curated list. You can also disable replies or sharing for tighter control over interactions.
How do you track performance and viewer behavior?
After posting, tap your story and swipe up to see who viewed it, how many taps forward or back occurred, exits, and replies. Use these metrics to refine timing and content.
What’s the difference between ephemeral posts and Highlights?
Ephemeral posts expire after 24 hours. Highlights let you save selected posts to your profile permanently, grouped under custom cover images for ongoing discovery.
What common mistakes should creators avoid on their first post?
Avoid low-resolution media, too many stickers or small text, and ignoring aspect ratio. Also, don’t post several similar items at once—space content to keep viewers engaged.
Any quick tips for brands and business accounts?
Use clear CTAs, schedule posts when your audience is active, leverage interactive features for feedback, and maintain consistent branding with color and typography.
How do links and product tags work for business profiles?
Eligible business accounts can add link stickers or product tags to drive traffic to sites or product pages. These tools increase conversion when paired with concise CTAs.
Which capture orientation and lighting work best?
Vertical (9:16) orientation fits the screen. Use natural light or soft fill lighting for clear visuals. Test filters sparingly to keep color and detail accurate.
Related Reading on TechKwiz
- How Instagram’s Algorithm Really Works in 2026 — Understand how the algorithm ranks your Stories and Reels
- Instagram Creator Edge 2026: Trial Reels, SEO & the Saves Algorithm — Level up from Stories to full creator strategy
- Social Commerce 2026: In-App Shopping Reshaping E-Commerce — Use Stories to drive product sales
- How to Create a Telegram Account Without Notifying Contacts — Another popular social media privacy guide